這篇將介紹當 laravel 開新專案時,有什麼地方可以參考。
{ 建立專案 }
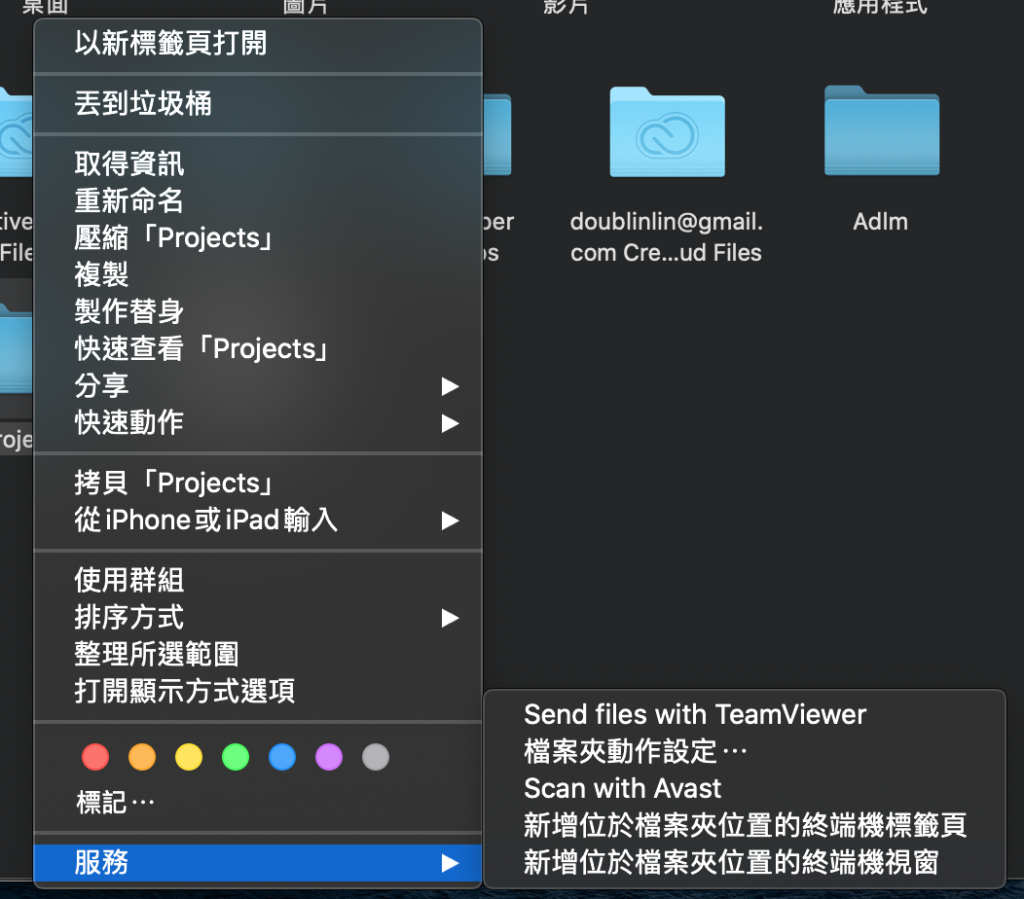
1. Mac版本:在你要建立專案的資料夾,點 [ 右鍵/ 服務/ 新增位於檔案夾位置的終端機視窗 ] ,終端機就會出現囉!
- 2. 終端機中輸入灰框中的指令,下列 2 點注意 :
- laravel 版本選你要的。( 注意:laravel 9 要搭配 php 8.0以上 )
- your-project 改成你的專案名稱。
composer create-project --prefer-dist laravel/laravel:^版本 your-project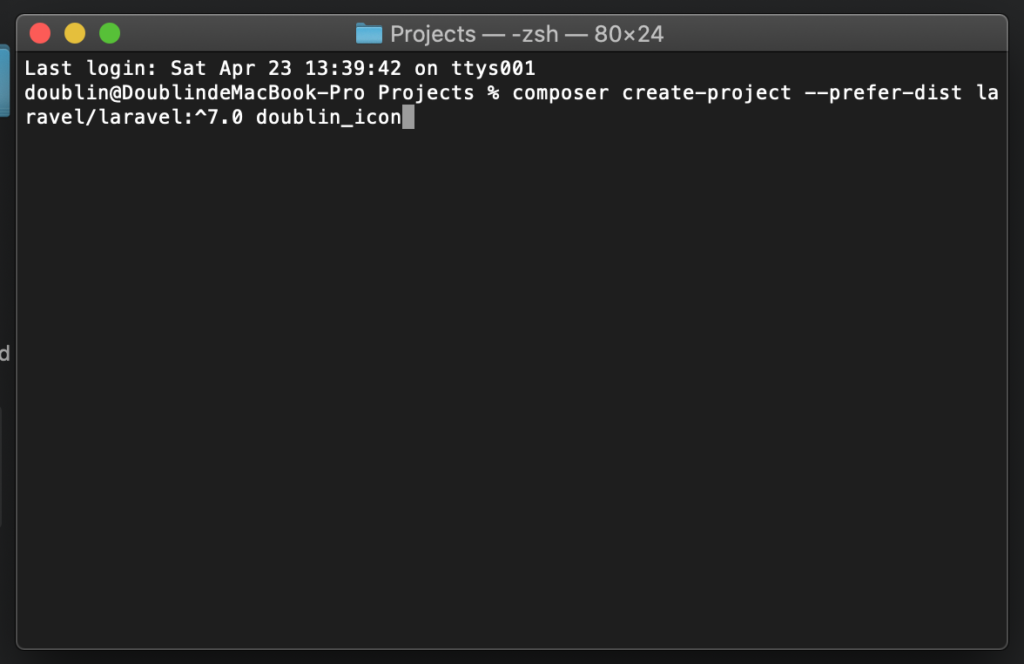
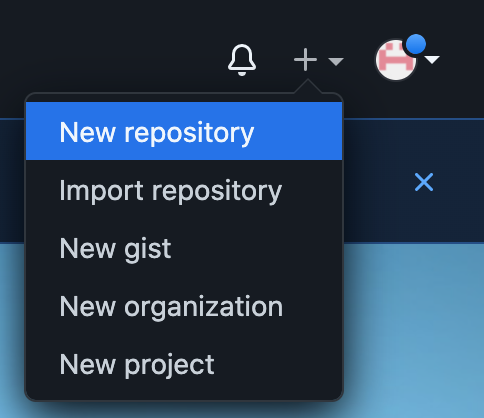
{ 連接 github }
在 github 上開新專案後,最後會出現引導圖,依序貼上引導圖上的指令到專案中


# 全新 repository
echo "# practice" >> README.md
git init
git add README.md
git commit -m "first commit"
git branch -M main
git remote add origin https://github.com/你的專案網址.git
git push -u origin main
# 已有 repository
git remote add origin https://github.com/你的專案網址.git
git branch -M main
# 如果要求重連你的帳號 ( Please tell me who you are )
git config --global user.email "you@example.com"
git config --global user.name "Your Name"
{ 檢查檔案 }
# 如果沒有 .env 檔案輸入指令複製一個 cp .env.example .env,或是
# php artisan key:generate: 開啟 .env,若 “APP_KEY” 沒有值的話。
{ 執行程式 }
# php artisan serve : 將會在 127.0.0.1:8000 本機上顯示網頁。
# php artisan serve –port=8080 :可以自由調整顯示網頁的 port,將會在 127.0.0.1:8080 本機上顯示網頁。
{ laravel 架構 }
# resources/view : 網頁視覺
<!-- 通常在範本中要更換內容的區域放置 -->
@yield('content')
<!-- 通常在是可更換內容的檔案中放置 -->
@extends('layouts.app') <!-- 拉進來的外層,@extends('資料夾.檔案名') -->
@section('content') <!-- 更換的內層開始,@section('@yield括號中文字') -->
@endsection <!-- 更換的內層結束 -->
<!-- 通常是把固定模組檔案拉進來 -->
@include('資料夾.檔案名')
# routes/web.php : 網頁路徑
// prefix 是這群組中的網址前都加上 works
Route::group(['prefix' => '/works'], function () {
// /works/Video 是顯示該頁面的網址
Route::get('/Video', 'VideoController@index');
});
# public/ : 網頁css/js/img/plugin放置處
# app/Http/Controllers : 網頁相關的傳入請求,包括顯示、創建、更新和刪除
// 對應到路徑的 index
public function index()
{
   // view('資料夾.檔案名')
   return view('works.Video');
}
從平面設計漸漸轉職到前端網頁,日常就是追劇、看綜藝大笑來撫平身心。
『沒事多學習,多學習好事。』來鼓勵躺平的自己。
喜歡我的文章請幫我按讚哦!信箱:doublinlin@gmail.com